The Backup4all Monitor consists of the Monitoring Server and the Monitoring Dashboard. This article explains how to configure Backup4all Monitor to work with Backup4all.
On this page:
- How to configure the Monitor Server
- How to configure Backup4all
- How to configure the Monitor Dashboard
How to configure the Monitor Server
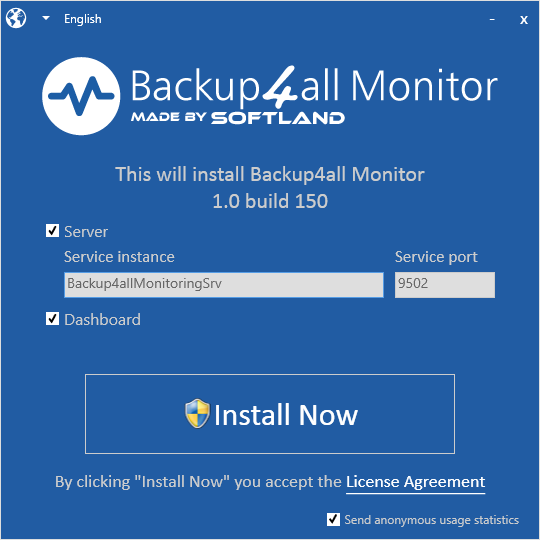
The Monitor Server configurations are simple and will be made on installation. You only have to enter the Service Instance name and the port number.

How to configure Backup4all
- Open Backup4all
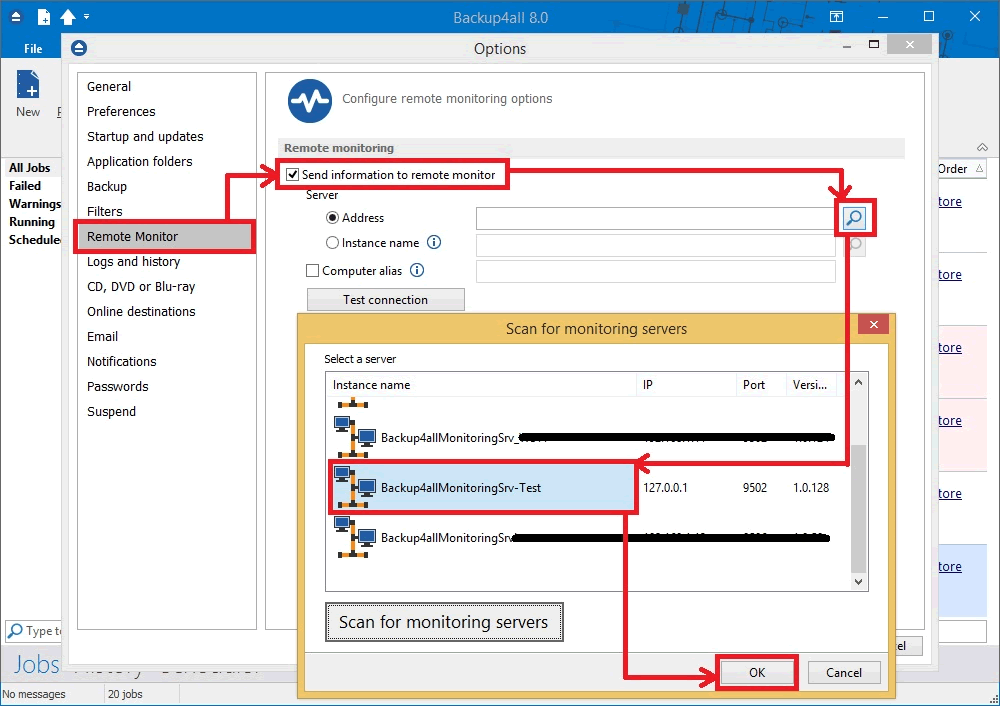
- Go to File->Options->Remote Monitor
- Enable the “Send information to remote monitor” option.
- Press the search icon from the Address field, to open “Scan for monitoring servers” window.
- Select the Instance name for the monitor you want to send backup information to, then press OK.
- In the Address field you can also manually enter the monitoring server’s IP followed by the port number and Instance name (example http://127.0.0.1:9502/Backup4allMonitoringSrv-Test)
- If the monitoring server is located in your network, you can use the “Instance name” field, where you must enter the name of the Instance for the monitoring server, or press the search button to scan the network. (example: Backup4allMonitoringSrv-Test)
- If you want to assign an alias for that computer, you can select the “Computer alias” option and type a name.
- When the remote monitor is selected, you can press the “Test connection” button and press OK.

How to configure the Monitor Dashboard
There are two possible cases when you configure the Monitor Dashboard:
- on the same computer where Backup4all Monitor was installed. In this case, Dashboard will automatically detect the server.
- on a different computer than the one where Backup4all Monitor is installed. In this case, the following steps are necessarily.
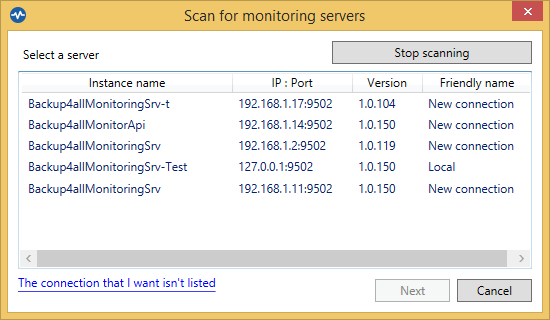
- After installing the Dashboard, on the first execution, the “Scan for monitoring servers” window will appear.
- There you can select one of the servers listed (from your network) or you can enter a new one by pressing the “The connection that I want isn’t listed” link.
![Backup4all Monitor - Configure Dashboard Backup4all Monitor - Configure Dashboard]()
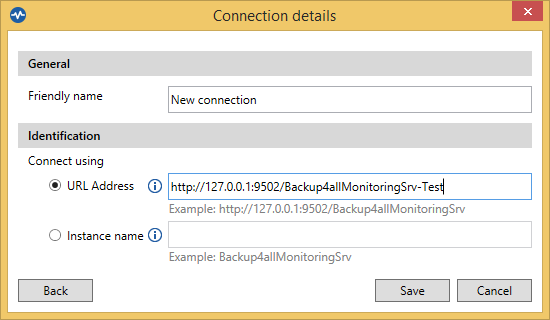
- In order to manually enter the details for a new connection, you can enter the IP, port and instance name or if the server is located in the same network, you can simply use only the Instance name. Then press Save button.
![Backup4all Monitor - Configure Dashboard Address Backup4all Monitor - Configure Dashboard Address]()
- After that, the Backup4all monitor the “Getting started” window will be shown.
![Backup4all Monitor - Getting Started Backup4all Monitor - Getting Started]()


