Hubic is a cloud storage provider supported by Backup4all to store your backups online. You can easily backup your data to your cloud Hubic account. This is a practical remote backup destination as it allows you to store important files offsite. It can be considered as an additional protection against data loss as the result of hardware failure or other disasters.
HubiC was discontinued. It was a cloud storage solution released in 2011 by OVH, a popular European storage provider.
If you are using Backup4all 7, 8 or 9 you will notice in the next update that hubiC will be removed from the list of available destinations. Don’t worry though, we still have support for 45 other cloud backup destinations, so if you were using hubiC it’s easy to find an alternative (i.e. Google Drive, Microsoft OneDrive). You can see here a full list of Backup4all destinations.
On this page:
HubiC is an online service which allows you to save your files online, in a totally private secure space. You are fully protected in the free hubiC cloud. If your hard drive fails or your computer gets lost or stolen, you can quickly access your files in hubiC.
With a limit of 25 GB, you can back up all your data, such as photos, videos and music. hubiC acts as an online hard drive which can be accessed from anywhere using your computer, laptop, tablet, smartphone or via the web application.
How to set up a new HubiC account
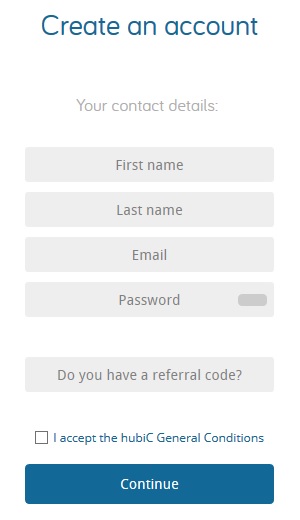
To create a new Hubic account, please follow these steps:
- Go to <https://hubic.com/home/new/>
- Follow the steps to create a new account.
![HubiC01 HubiC01]()
How to backup to HubiC
Steps to follow:
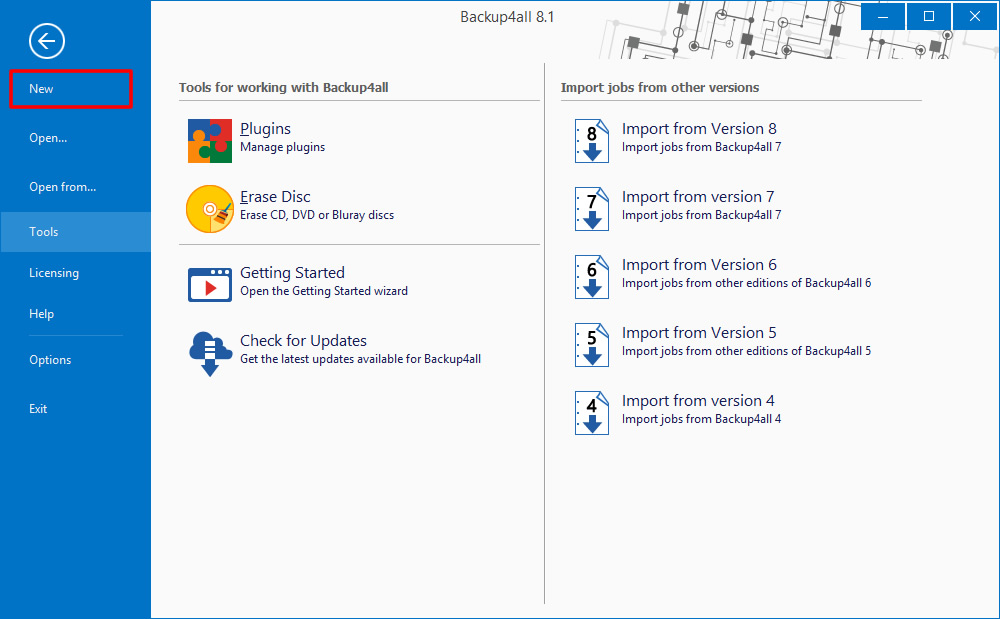
- Open Backup4all and select File -> New or press Ctrl+N.
![HubiC02 HubiC02]()
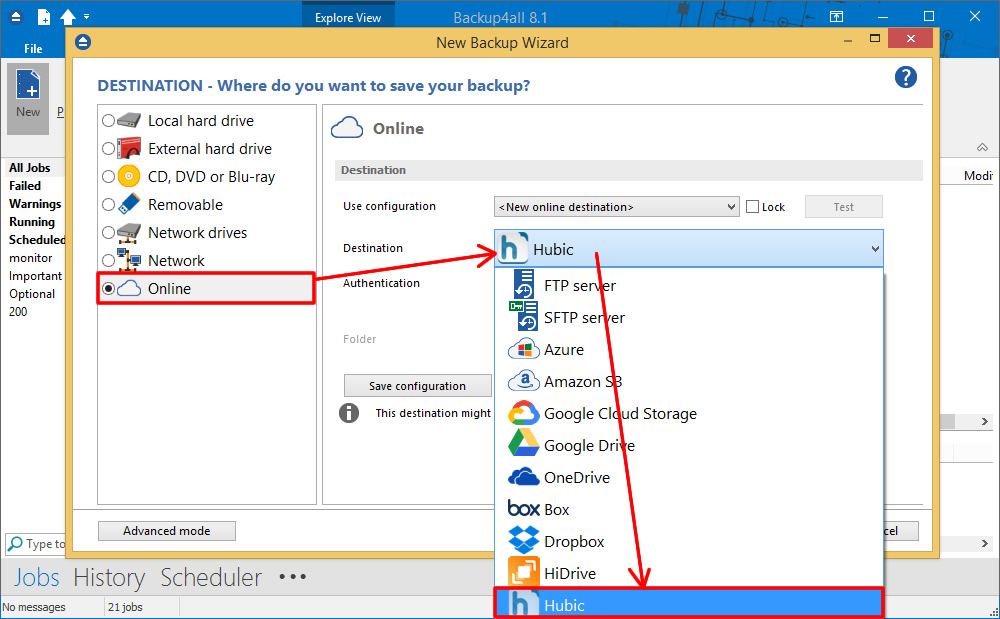
- On the Where do you want to save the backup page, select HubiC as a backup destination.
![HubiC04 HubiC04]()
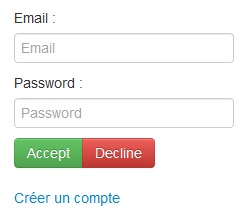
- Press Choose account. A new window will appear asking you to log on into your HubiC account. Press Next to continue.
![HubiC05 HubiC05]()
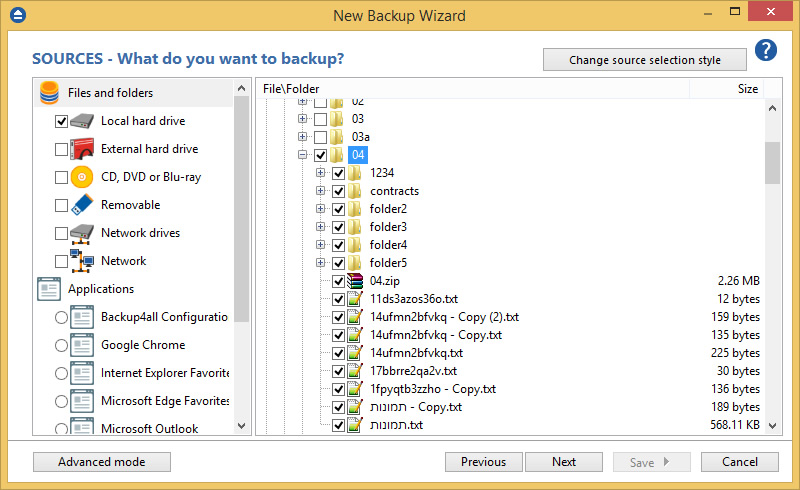
- On the What do you want to backup page add the backup sources. Press Next to continue.
![HubiC06 HubiC06]()
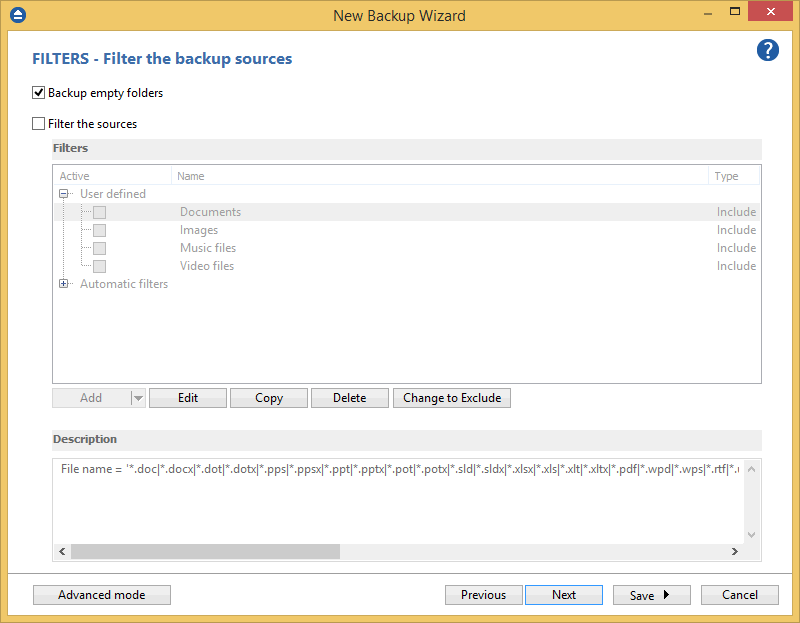
- On the Filter the backup sources page, you can set include/exclude filters for backup sources. Then press Next.
![HubiC03 HubiC03]()
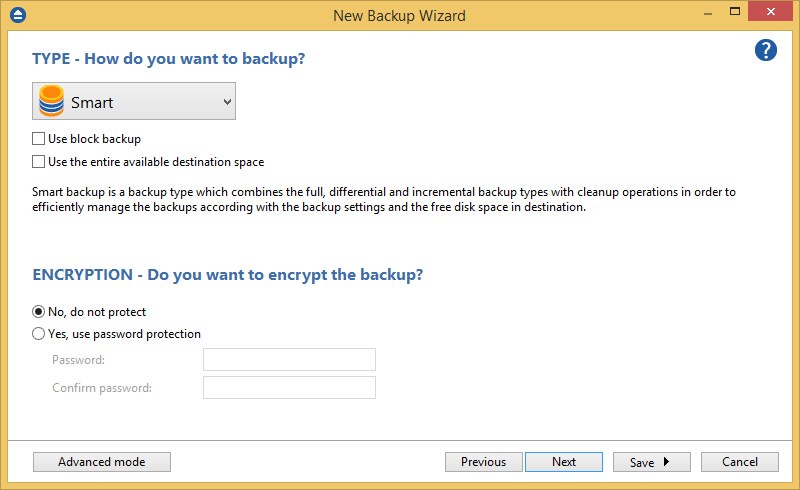
- On the How do you want to backup page, you can choose the backup type and optionally set the encryption. Press Next.
![HubiC07 HubiC07]()
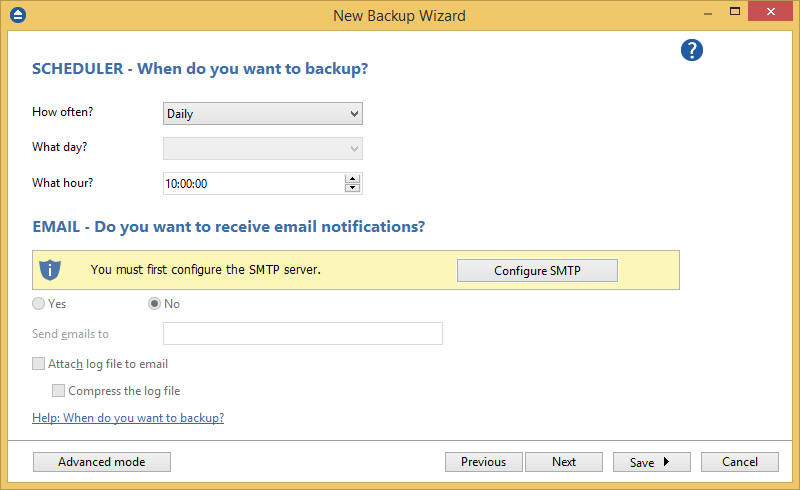
- On the When do you want to backup page, you can set the backup job to run automatically at certain dates or a specific time.
![HubiC08 HubiC08]()
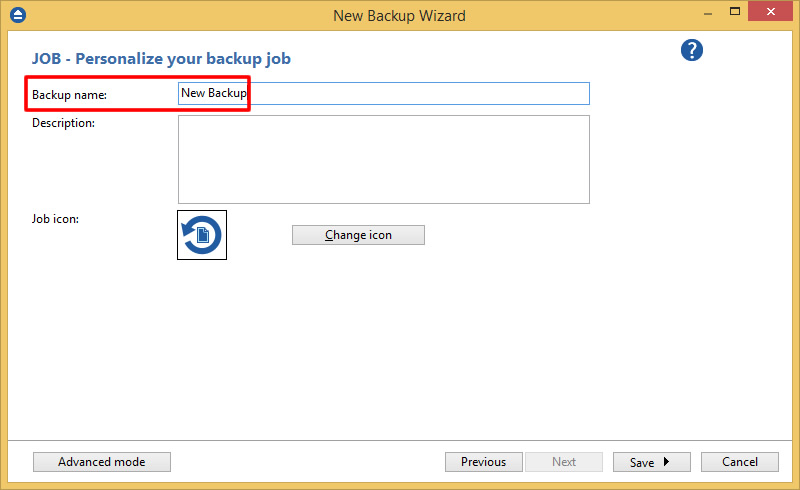
- On the Personalize your backup job page, enter a name for the backup in the Backup name field.
![HubiC03 HubiC03]()
- Press Save and select Save and run to execute the backup job as soon as you press the button.
How to restore from HubiC
Steps to follow:
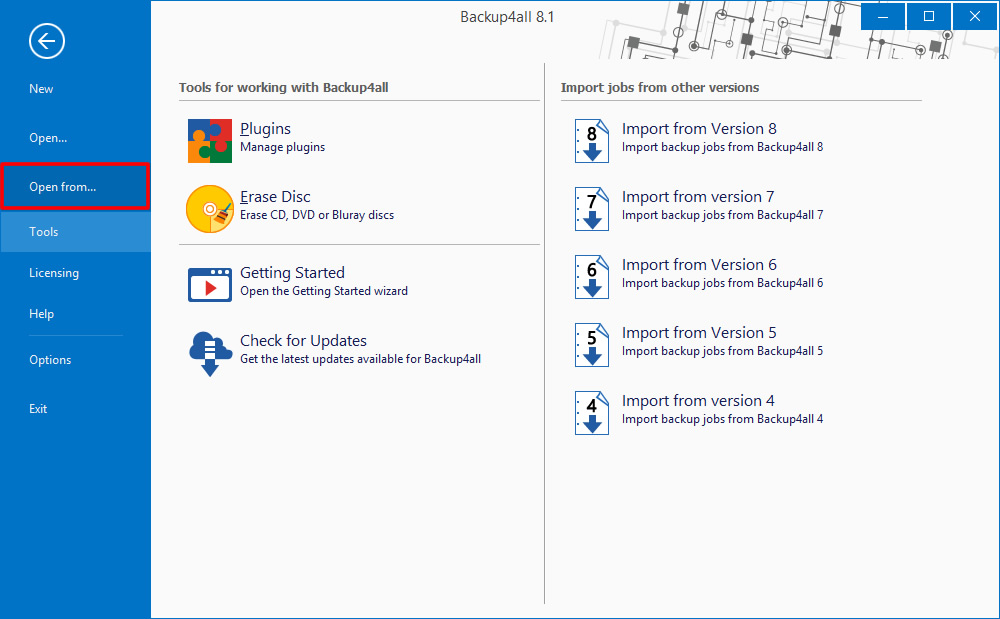
- If the backup job does not exist in Backup4all, you must open it from File -> Open from.
![HubiC09 HubiC09]()
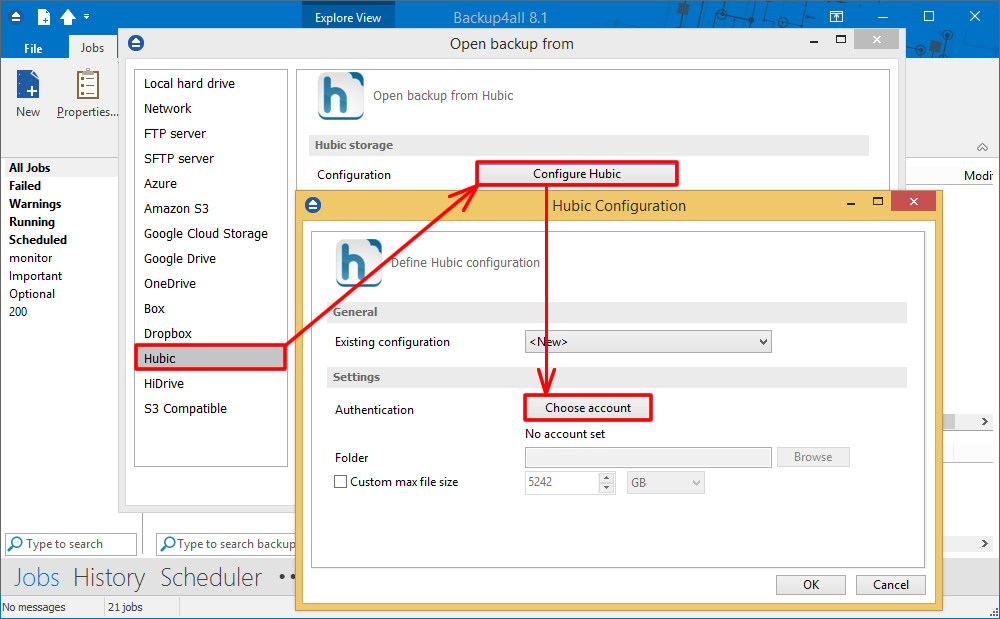
- Select HubiC page. Configure the HubiC account
![HubiC10 HubiC10]()
- After the HubiC account was set, press Show to display the backup jobs in destination. Select the catalog you want to open and press Open. Backup4all will recreate that backup job.
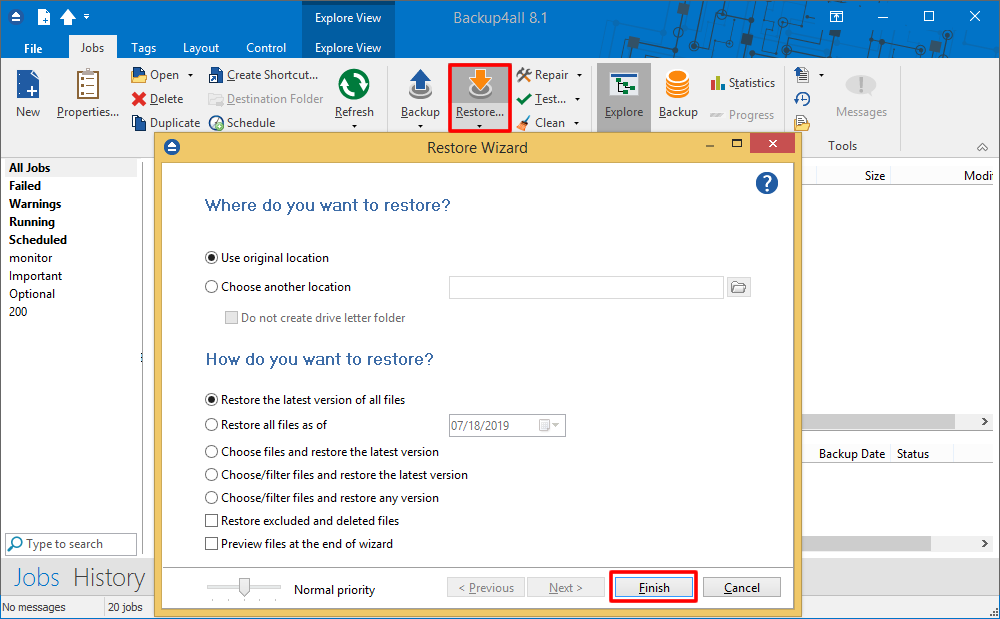
- Press the Restore (F7) button. Optionally you can select the location you want to restore the files to. Original location is selected by default.On the same page, you can choose how do you want to restore or you can filter the files before the restore.If you select to restore from a specific version, press Next to indicate the version or the date you want to restore the files. Press Next
- Press Finish to start the restore process.
![HubiC11 HubiC11]()


