HiDrive is a cloud storage provider supported by Backup4all to store your backups online. You can easily backup your data to your cloud HiDrive account. This is a practical remote backup destination as it allows you to store important files offsite. It can be considered as an additional protection against data loss as the result of hardware failure or other disasters.
HiDrive is an online service which stores your files securely and keeps them well organized. All of your files are brought together in one central location, accessible to you, anytime, anywhere. All you need is internet access via your PC, Laptop, tablet or smartphone.
HiDrive has further access options for you: for example, log in to online File Manager via your browser, or on your mobile via WebDAV. For advanced users, SMB, FTP and rsync are available.
This means you can use HiDrive as a conventional hard drive (SMB), transfer large files (FTP) or even use your HiDrive with an NAS box (rsync). In your account settings you can activate whichever transmission protocols you want to use at any time.
How to set up a new HiDrive account
To create a new HiDrive account, please follow these steps:
- Go to HiDrive website
- Follow the steps to create a new account.
![hidrive01 hidrive01]()
How to backup to HiDrive
Steps to follow:
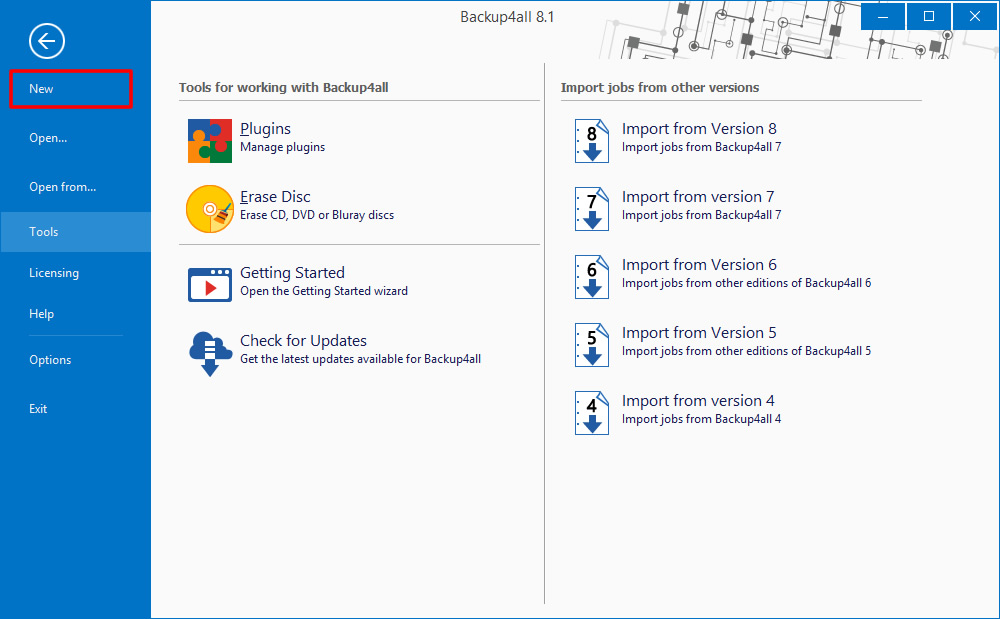
- Open Backup4all and select File -> New (Ctrl+N).
![hidrive02 hidrive02]()
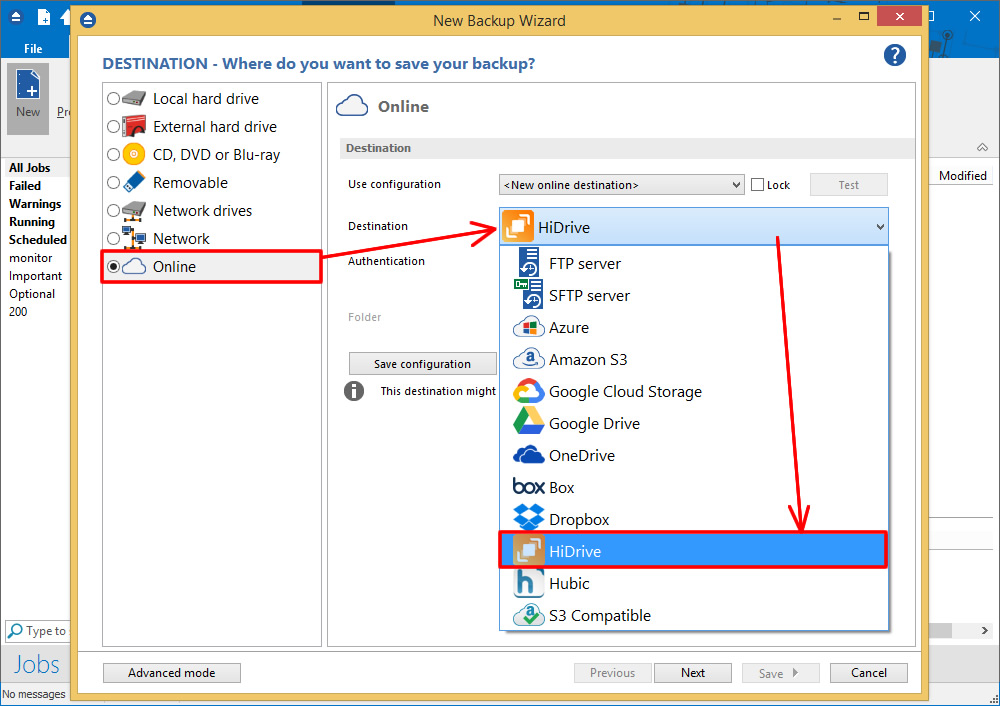
- In the Where do you want to save your backup page, select Online->HiDrive as backup destination.
![hidrive02 hidrive02]()
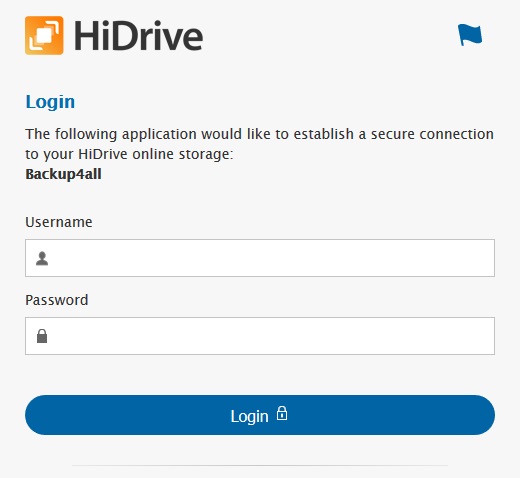
- Press Choose account. A new window will appear to log on into your HiDrive account. Then press Next.
![hidrive03 hidrive03]()
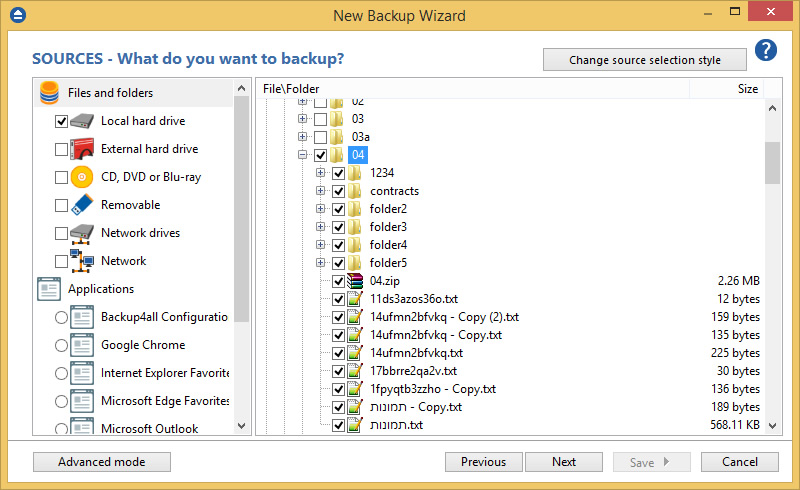
- On the What do you want to backup page, add the backup sources. Press Next.
![hidrive06 hidrive06]()
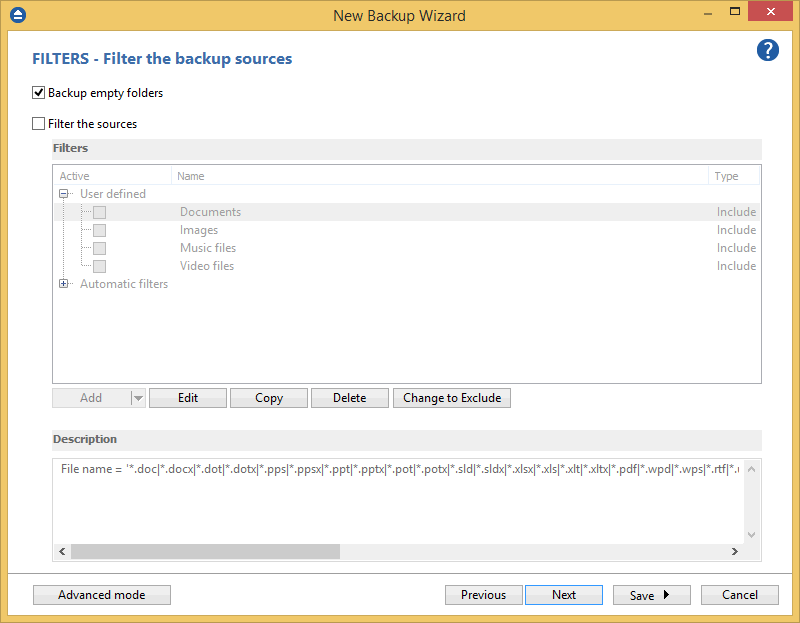
- On the Filter the backup sources page, you can set include/exclude filters for backup sources. Then press Next.
![hidrive03 hidrive03]()
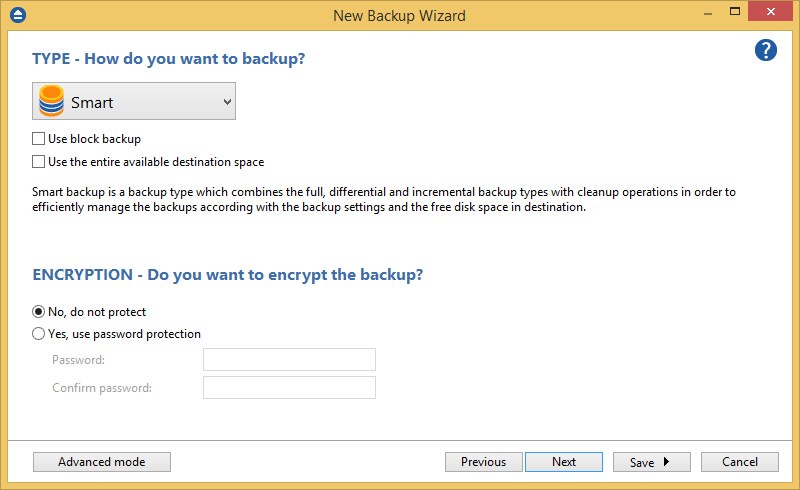
- On the How do you want to backup page, you can choose the backup type and optionally set the encryption. Press Next.
![hidrive07 hidrive07]()
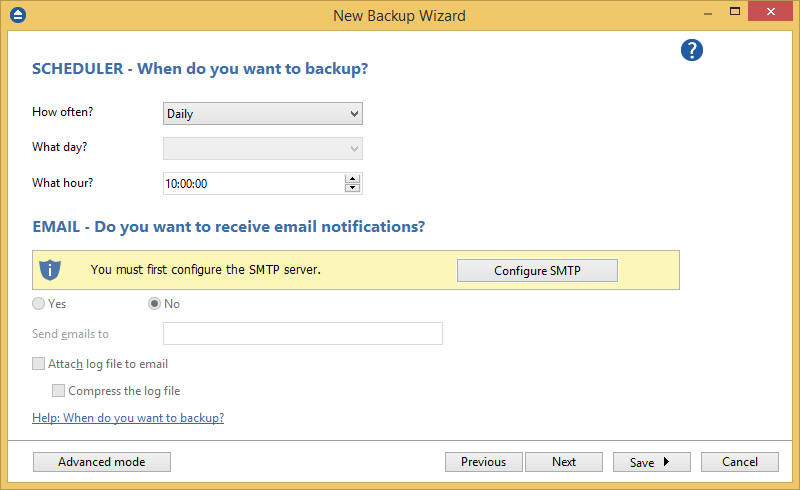
- On the When do you want to backup page, you can set the backup job to automatically run on the specified time and days.
![hidrive08 hidrive08]()
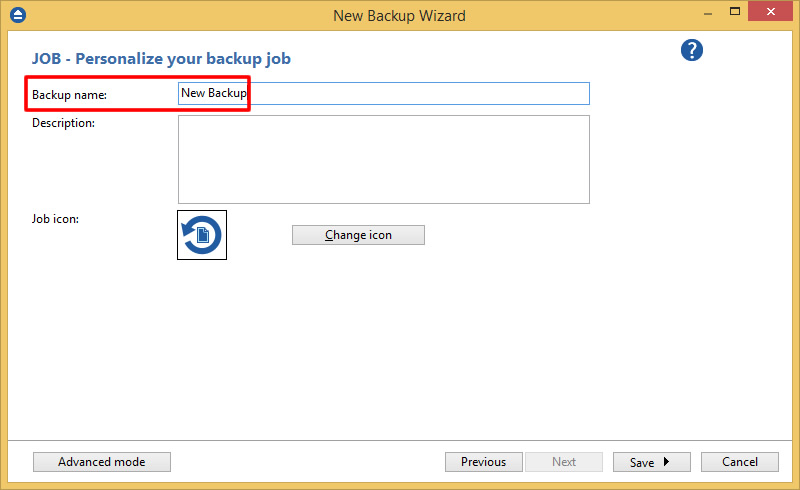
- On the Personalize your backup job page, enter a name for the backup in the Backup name field.
![hidrive03 hidrive03]()
- Press Save -> Save and run.


